Assignment 3 - Tutorial & Reflection
Tutorial - Blister

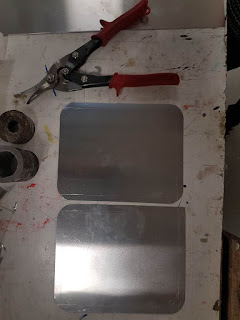
Tools you need:
Nylon Mallet (with Edge, with Flat End, with Round)
Steel Planishing Hammer
Steel Dolly
Sand Bag
Scribe
Tin Snips
Files
0.5 to 1 mm thick aluminum sheet
Wood Template with shape(blister)
4 set screws and nuts
Step 1 - Laser cutting wood templates and get two pieces of the same shape. Drill four holes at the corner for screws.

Step 2 - Cutting & smooth the wood template.
Using the files to smooth the edge and offer a good space for the aluminum.
Tips: Careful using the files and avoid changing the shape.


Step 3 - Cut a suitable piece of aluminum, and put it between two pieces of wood. Lock three pieces together.

Step 4 - Start to hammer the aluminum.
Put the sand bag underneath and allow the aluminum shape can go downward.


Important: Hammer the big part first and hammer the small gap. Hammer the edge as the orange arrows showing, and allow the material extend downward. Then hammer small gap carefully with a fitted wood piece. It is like blow a balloon, the gap can be not really extending out, and then it slightly becoming bigger to the bigger area part. Otherwise, hammer the middle part rather than the edge, the material get thinner and crack easily.


Step 5 - Unlock the screws and smooth the aluminum shape.
Put the aluminum round shape on the steel dolly and use the steel planishing hammer to smooth the surface. As well as extend the round shape until you satisfy.


Step 6 - Mark the outline and cut the outer shape.
Using the scribe to make the outline from the shape around 10mm.
Using the tin snip to cut the outline shape.


Using the files to smooth the edge.


Keep doing this until you're satisfied with the skin and texture.
Finally, get the blister shape.

Reflection
4th-year industrial design
Related examples of metal working to industrial design.

This course helped me to explore and understand the metal and how the material and process work. I learned the technique of different forces and tools to shape the object. It allows me to more understanding the manufacture and to design a product better. This course is fun and enjoyable!

Comments
Post a Comment