Posts

Showing posts from April, 2017

The Blister

Image
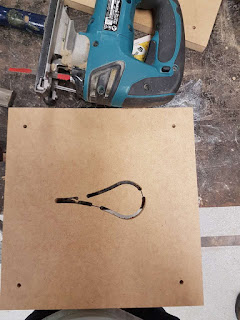
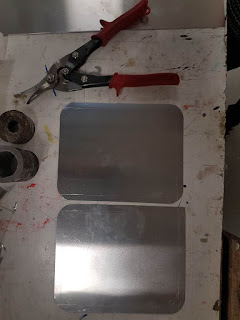
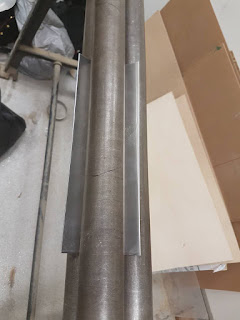
The Blister Making Step 1 - Get the template (two same patterns)  CNC machine cutting by tutor & Cut the pattern inside  with jigsaw power tool   Step 2 - Sanding the inside part smoothly with the router power tool & filers Step 3 - Insert a piece of aluminum between two pieces template  & Screw at four corners  Step 4 - Hammer the aluminium part as blow a bloom  Hammer the bottom part first and start around the edge.    Step 5 - Keep hammering & make it more depth  Then hammer to the narrow part.       Step 6 - Unscrew the template and take the aluminum piece out   Step 7 - Cut the outer into a shape Using scribe to measure and mark then cut with the tin snips Step 8 - Smooth the edges with filers and sand paper         B

Tray

Image
   Making the tray / Partner with Rosabel Step 1 - Cut two pieces material in same size & One for each Measuring the material in a big piece and cut the round corners with the cylinder steel. Then mark the inner size with the scribe.     Step 2 - Making a wood template as the inner size.     Step 3 - Hammer the edges Care about with the round corners.      Step 4 - Take the wood template off    Step 5 - Cut the extended corners    Step 6 - Match with partner's half one Step 7 - Adjust & Make it match perfect  Perfect !

The Torus

Image
The process of making the torus Step 1 - Cut a piece of flat sheet and roll it with the metal roller.     Step 2 - Secondary Curve  Using the stretcher to make the reverse curve. During the process,  it has to really care about the power of using the stretcher, if it is too much power will crack the material.   Step 3 - Adjust the reverse curve & Curve the edges   The reverse curve is not much obviously, then hammer it with the wood cylinder.   Step 4 - Adjust the curve & Smooth the torus End.